Getting started with Azure Static Web Apps
In series, I’ll share with you a getting started tutorial for Azure SWA — building an application to convert CSV files to Excel XLSX files
Azure Static Web Apps (Azure SWA for short) is an interesting service from Microsoft Azure that allows us to quickly and cheaply build and deploy web applications. One of the most suitable use cases I found is building React SPA applications with a serverless backend powered by Azure Functions.
However, the documentation for Azure Static Web Apps in my opinion is not great. I don’t know why, but Microsoft writes their docs in such a way that it relies heavily on your IDE. For example, in their official docs — Quickstart: Build your first static site with Azure Static Web Apps — you will need to install Azure Static Web Apps extension to get started.
In this 2-part series, I’ll share with you a getting started tutorial — building an application to convert CSV files to Excel XLSX files, and deploy it, using only available Azure SWA CLI and Azure Function CLI.
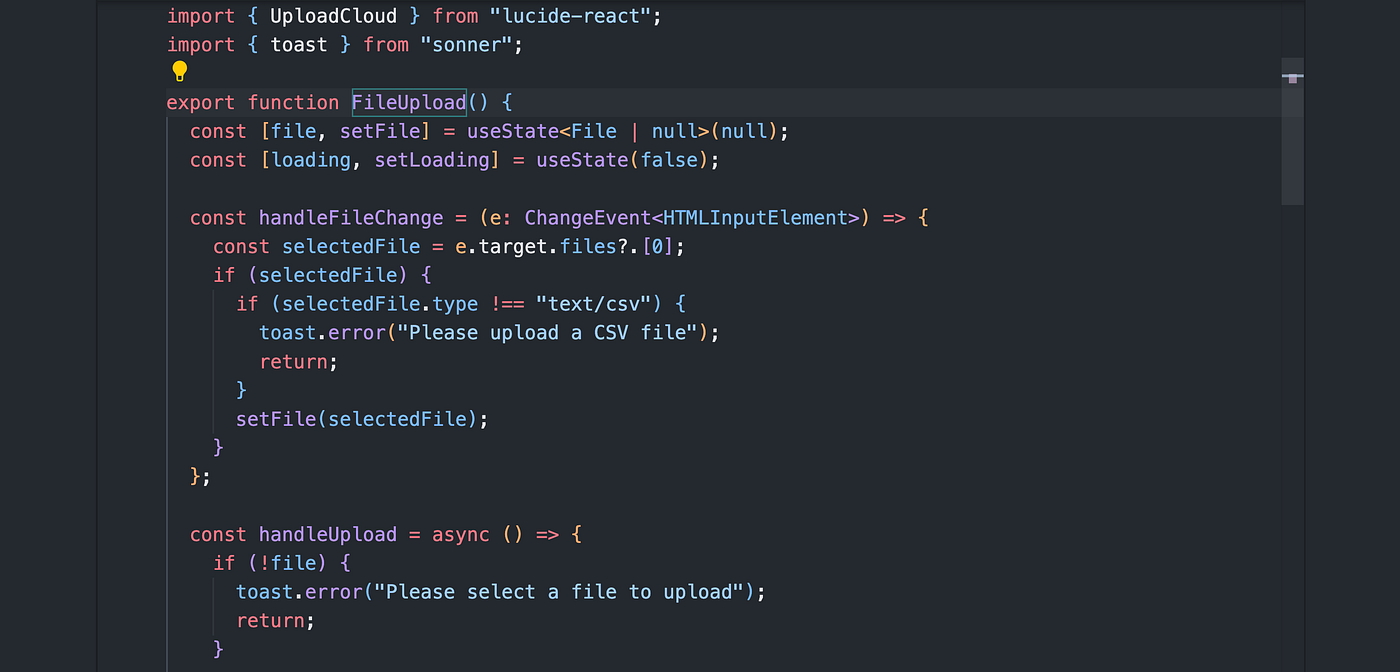
Screenshot, FileUpload component
Develop your SPA
The first step is to develop your single page application normally as you would without Azure SWA. Let’s use the most common tools and libraries at the moment: Vite, React, Shadcn UI.
Init Vite React app with Shadcn UI
npm create vite@latestSetup Shadcn UI, from their docs:
npm install -D tailwindcss postcss autoprefixernpx tailwindcss init -pAdd following to your index.css:
@tailwind base;
@tailwind components;
@tailwind utilities;

/* ... */
Then configure content in Tailwind CSS config file:
/** @type {import('tailwindcss').Config} */
module.exports = {
  content: ["./index.html", "./src/**/*.{ts,tsx,js,jsx}"],
  theme: {
    extend: {},
  },
  plugins: [],
}
Configure your tsconfig.json
{
  "files": [],
  "references": [
    {
      "path": "./tsconfig.app.json"
    },
    {
      "path": "./tsconfig.node.json"
    }
  ],
  "compilerOptions": {
    "baseUrl": ".",
    "paths": {
      "@/*": ["./src/*"]
    }
  }
}
Configure your tsconfig.app.json :
{
  "compilerOptions": {
    "target": "ES2020",
    "useDefineForClassFields": true,
    "lib": ["ES2020", "DOM", "DOM.Iterable"],
    "module": "ESNext",
    "skipLibCheck": true,

    /* Bundler mode */
    "moduleResolution": "bundler",
    "allowImportingTsExtensions": true,
    "isolatedModules": true,
    "moduleDetection": "force",
    "noEmit": true,
    "jsx": "react-jsx",

    /* Linting */
    "strict": true,
    "noUnusedLocals": true,
    "noUnusedParameters": true,
    "noFallthroughCasesInSwitch": true,
    "noUncheckedSideEffectImports": true,

    "baseUrl": ".",
    "paths": {
      "@/*": ["./src/*"]
    }
  },
  "include": ["src"]
}
Configure your tsconfig.node.json
{
  "compilerOptions": {
    "target": "ES2022",
    "lib": ["ES2023"],
    "module": "ESNext",
    "skipLibCheck": true,

    /* Bundler mode */
    "moduleResolution": "bundler",
    "allowImportingTsExtensions": true,
    "isolatedModules": true,
    "moduleDetection": "force",
    "noEmit": true,

    /* Linting */
    "strict": true,
    "noUnusedLocals": true,
    "noUnusedParameters": true,
    "noFallthroughCasesInSwitch": true,
    "noUncheckedSideEffectImports": true
  },
  "include": ["vite.config.ts"]
}
Update vite.config.ts
npm install -D @types/nodeimport path from "path"
import react from "@vitejs/plugin-react"
import { defineConfig } from "vite"
export default defineConfig({
plugins: [react()],
resolve: {
alias: {
"@": path.resolve(__dirname, "./src"),
},
},
})Run CLI to init Shadcn UI, follow the questions prompted by the CLI to finish the setup.
npx shadcn@latest initImplement the app
Add Shadcn UI components:
npx shadcn@latest add button card input sonnerAdd FileUpload component:
// src/components/file-upload.tsx
import { ChangeEvent, useState } from "react";
import {
  Card,
  CardContent,
  CardDescription,
  CardHeader,
  CardTitle,
} from "./ui/card";
import { Input } from "./ui/input";
import { Button } from "./ui/button";
import { UploadCloud } from "lucide-react";
import { toast } from "sonner";

export function FileUpload() {
  const [file, setFile] = useState<File | null>(null);
  const [loading, setLoading] = useState(false);

  const handleFileChange = (e: ChangeEvent<HTMLInputElement>) => {
    const selectedFile = e.target.files?.[0];
    if (selectedFile) {
      if (selectedFile.type !== "text/csv") {
        toast.error("Please upload a CSV file");
        return;
      }
      setFile(selectedFile);
    }
  };

  const handleUpload = async () => {
    if (!file) {
      toast.error("Please select a file to upload");
      return;
    }

    try {
      setLoading(true);

      // Prepare form data
      const formData = new FormData();
      formData.append(`file${file.name}`, file);

      // Send to Azure Function
      const response = await fetch("/api/convert-csv-to-xlsx", {
        method: "POST",
        body: formData,
      });

      if (!response.ok) {
        throw new Error("Failed to convert file");
      }

      const blob = await response.blob();
      const url = window.URL.createObjectURL(blob);
      const a = document.createElement("a");
      a.href = url;

      // Set the name of the downloaded file
      a.download = "processed_file.xlsx";
      document.body.appendChild(a);
      a.click();
      a.remove();

      toast.success("File converted successfully!");
    } catch (error) {
      console.error("Error:", error);
      toast.error("Failed to convert file");
    } finally {
      setLoading(false);
    }
  };

  return (
    <Card className="w-full max-w-md mx-auto">
      <CardHeader>
        <CardTitle>CSV to XLSX Converter</CardTitle>
        <CardDescription>
          Upload your CSV file to convert it to XLSX format
        </CardDescription>
      </CardHeader>
      <CardContent className="space-y-4">
        <div className="grid w-full items-center gap-4">
          <Input
            type="file"
            accept=".csv"
            onChange={handleFileChange}
            className="cursor-pointer"
          />
          {file && (
            <p className="text-sm text-muted-foreground">
              Selected file: {file.name}
            </p>
          )}
          <Button onClick={handleUpload} className="w-full" disabled={loading}>
            <UploadCloud className="mr-2 h-4 w-4" />
            {loading ? "Converting..." : "Upload and Convert"}
          </Button>
        </div>
      </CardContent>
    </Card>
  );
}
Modify your app:
// src/App.tsx
import { Toaster } from "@/components/ui/sonner";
import { FileUpload } from "./components/file-upload";

function App() {
  return (
    <div className="min-h-screen bg-background flex items-center justify-center p-4">
      <FileUpload />
      <Toaster />
    </div>
  );
}

export default App;
That’s it for the first step. Right now your app won’t upload files successfully as we haven’t add the backend yet.
Getting started with Azure SWA CLI
npm install -g @azure/static-web-apps-cli@latestThen init config for SWA:
swa initAdd backend with Azure Function
brew tap azure/functions
brew install azure-functions-core-tools@4
mkdir api
cd api
func init --typescript --model V3
func new --name convert-csv-to-xlsx --template "HTTP trigger" --authlevel "anonymous"
npm installAdd backend libraries used for uploading and converting files:
npm install @anzp/azure-function-multipart xlsxEdit your function logic:
// api/convert-csv-to-xlsx/index.ts
import parseMultipartFormData from "@anzp/azure-function-multipart";
import { AzureFunction, Context, HttpRequest } from "@azure/functions";
import * as XLSX from "xlsx";

const httpTrigger: AzureFunction = async function (
  context: Context,
  req: HttpRequest
): Promise<void> {
  context.log("HTTP trigger function processed a request.");

  if (req.method !== "POST") {
    context.res = {
      status: 405,
      body: { error: "Method not allowed" },
    };
    return;
  }

  try {
    const { files } = await parseMultipartFormData(req);

    // Parse CSV data
    const workbook = XLSX.read(files[0].bufferFile, { type: "buffer" });

    // Convert to XLSX
    const xlsxBuffer = XLSX.write(workbook, {
      bookType: "xlsx",
      type: "array",
    });

    context.res = {
      status: 200,
      headers: {
        "Content-Type": "application/octet-stream",
        "Content-Disposition": `attachment; filename="converted.xlsx"`, //specify the filename
      },
      body: Buffer.from(xlsxBuffer),
    };
  } catch (error) {
    context.log.error("Error converting file:", error);
    context.res = {
      status: 500,
      body: { error: "Error converting file" },
    };
  }
};

export default httpTrigger;
Start the entire app together
Build and start Azure Function at your local. From ./api , start with verbose option to see more logs:
npm run build
func start --verbose
The backend is now running at port 7071. Open another terminal and start our SWA from root of the project:
swa start --api-devserver-url http://localhost:7071Azure Static Web Apps emulator will start at http://localhost:4280. Go there and check it out the whole flow.
That’s the end of the first part of this series. You now have a functional application running with the SWA emulator and an Azure Function backend in your local environment. The next step will be deploying the application to Azure. Stay tuned for my upcoming article on that!